
3D Hangar · Current R2 package · 31 October 2026
Relay 1200 P build guide
Interactive 3D viewerFree · name and email required
Print and fit prototype: physical printing, installed hardware and flight validation remain outstanding.
What changed
- Selected exact ESC, receiver, regulator and battery models and added their true case envelopes.
- Added two flat printed electronics decks with strap slots; no carbon tubes.
- Added a wiring plan, through-fastener guidance and actual retract/axle measuring sheet.
These are digital design and documentation checks. No new physical print, load, radio, water or flight tests have been performed.
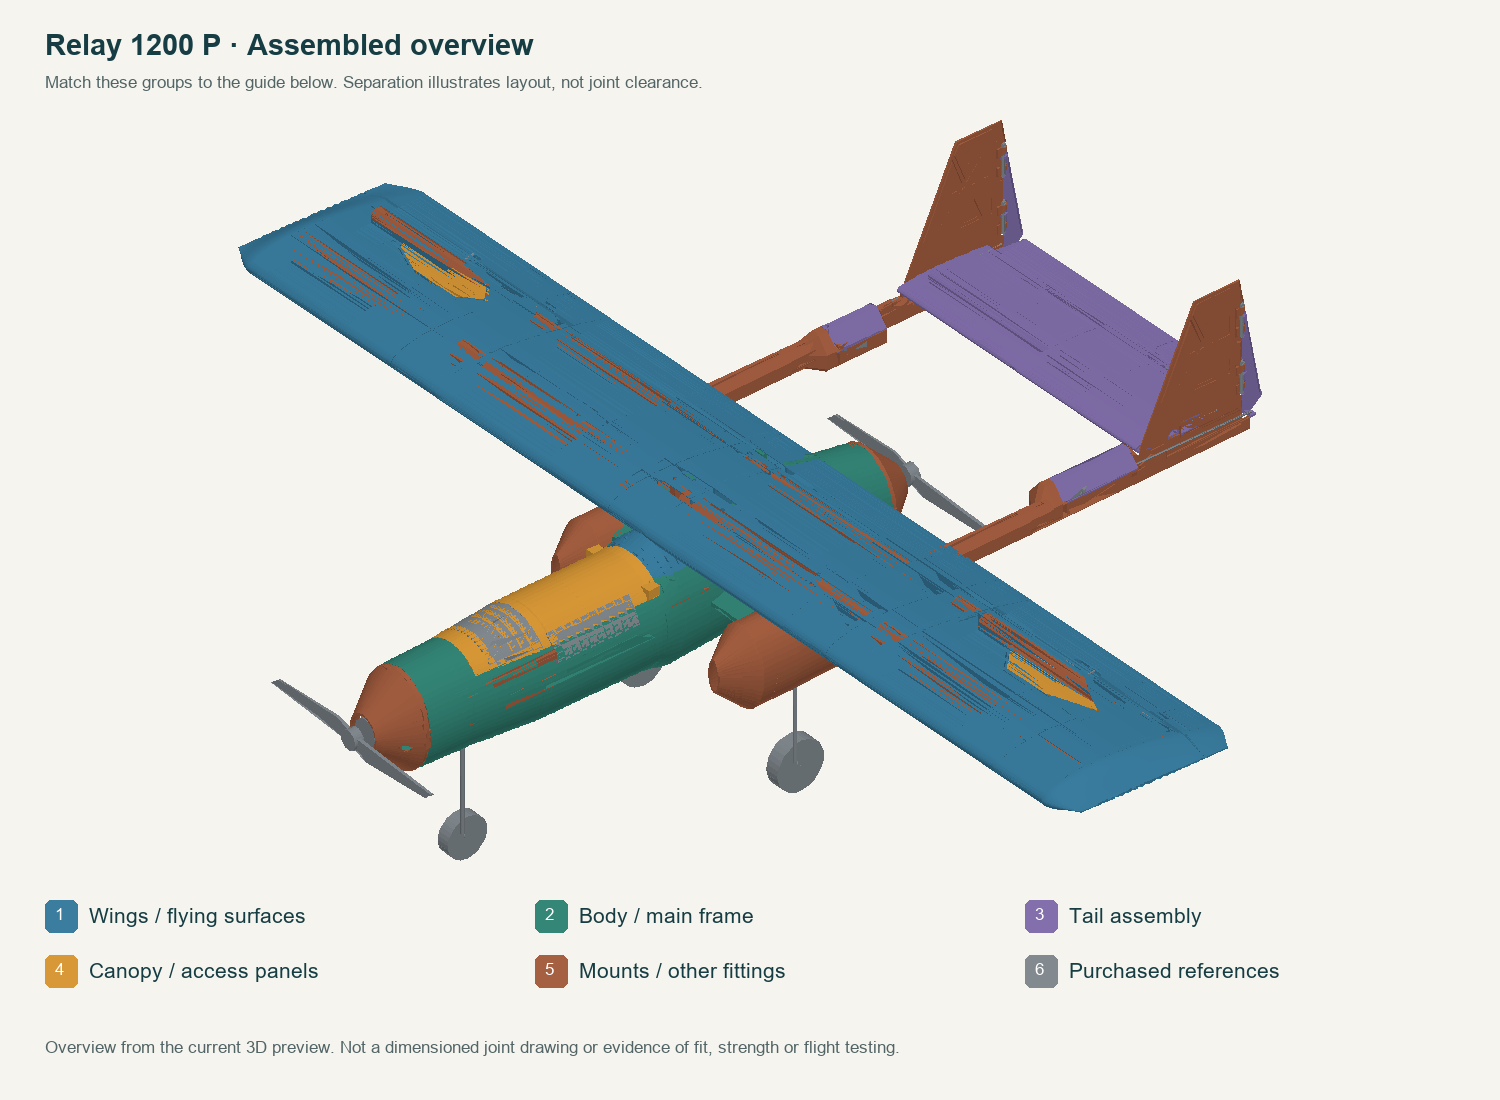
Before printing
Use the supplied orientation and 100% scale. The 3MF files contain geometry and arrangement, not a validated printer/material profile or ready-to-run G-code. Use the material listed for each plate. Slice with supports off where specified and inspect the first layers, bridges, thin-wall continuity and holes before printing.
Mounting and connection details
Coordinates refer to the assembled CAD datum, not the slicer’s rearranged plate. Dimensions below are millimetres unless stated otherwise.
| Interface | Dimension / part | Assembly action |
|---|---|---|
| Electronics decks | S04 X208–345.5; S05 X408–477; both underside Z62. | Dry-fit on pod rails. S05 notches clear uprights. Bond only contacting lands after coupon testing. Use 1 mm insulating pads and two 8 mm straps per receiver, ESC pair and regulator. |
| Motor cross | Supplied metal X-mount: outer opposite centers 34 mm; motor inner pairs 16/19 mm. | The inner pattern is not a rectangular 16 × 19 grid. Limit motor screw penetration to the manufacturer’s 2.8 mm. |
| Retracts | EFLG230 kit; mounting grid 23 × 27.5 mm. | Retain supplied struts, axles, steering arm and three-way harness. Measure pivot, axle and usable strut length; do not infer these from the 3.5 mm strut diameter. |
| Wheels | Candidate mains DU-BRO225SL, 57.15 × 19.8 mm, 5/32 in bore; nose 175SL,44.45 ×17.5 mm,1/8 in bore. | Confirm actual axle diameters and usable length before buying/fitting; nominal strut diameter is not axle diameter. |
| Links | Five control runs plus steering; candidate DU-BRO 367 ball links /378 threaded 2-56 rod blanks,109 steering clevis. | Do not mix M2 and 2-56. Keep E-flite sliding steering arm; mark rods only after neutral setup and full retraction sweep. |
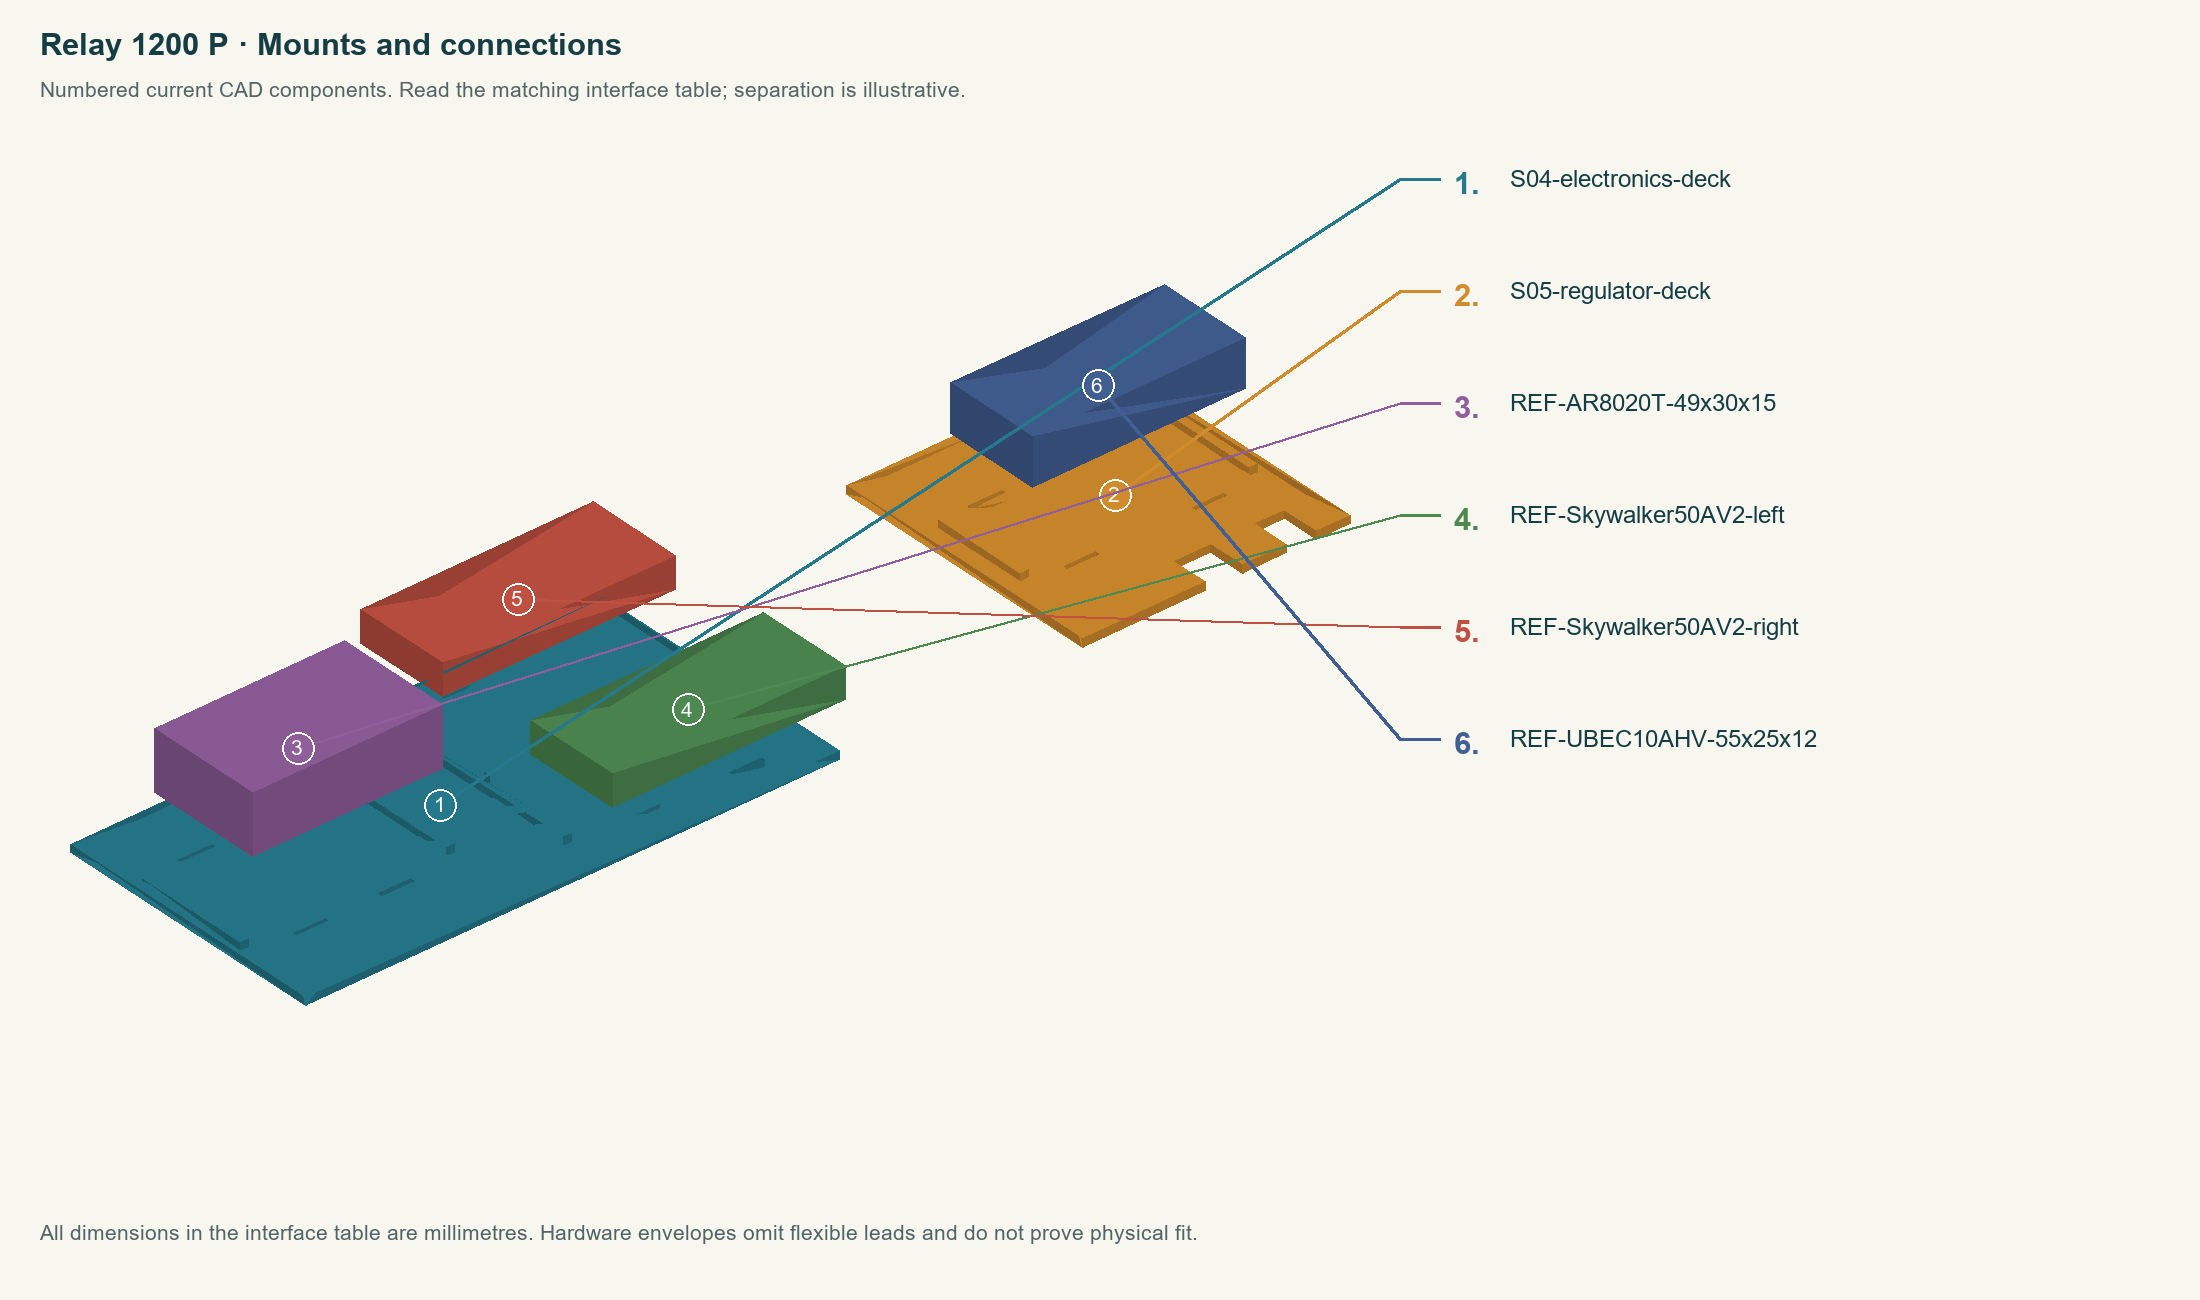
S04-electronics-deckS05-regulator-deckREF-AR8020T-49x30x15REF-Skywalker50AV2-leftREF-Skywalker50AV2-rightREF-UBEC10AHV-55x25x12
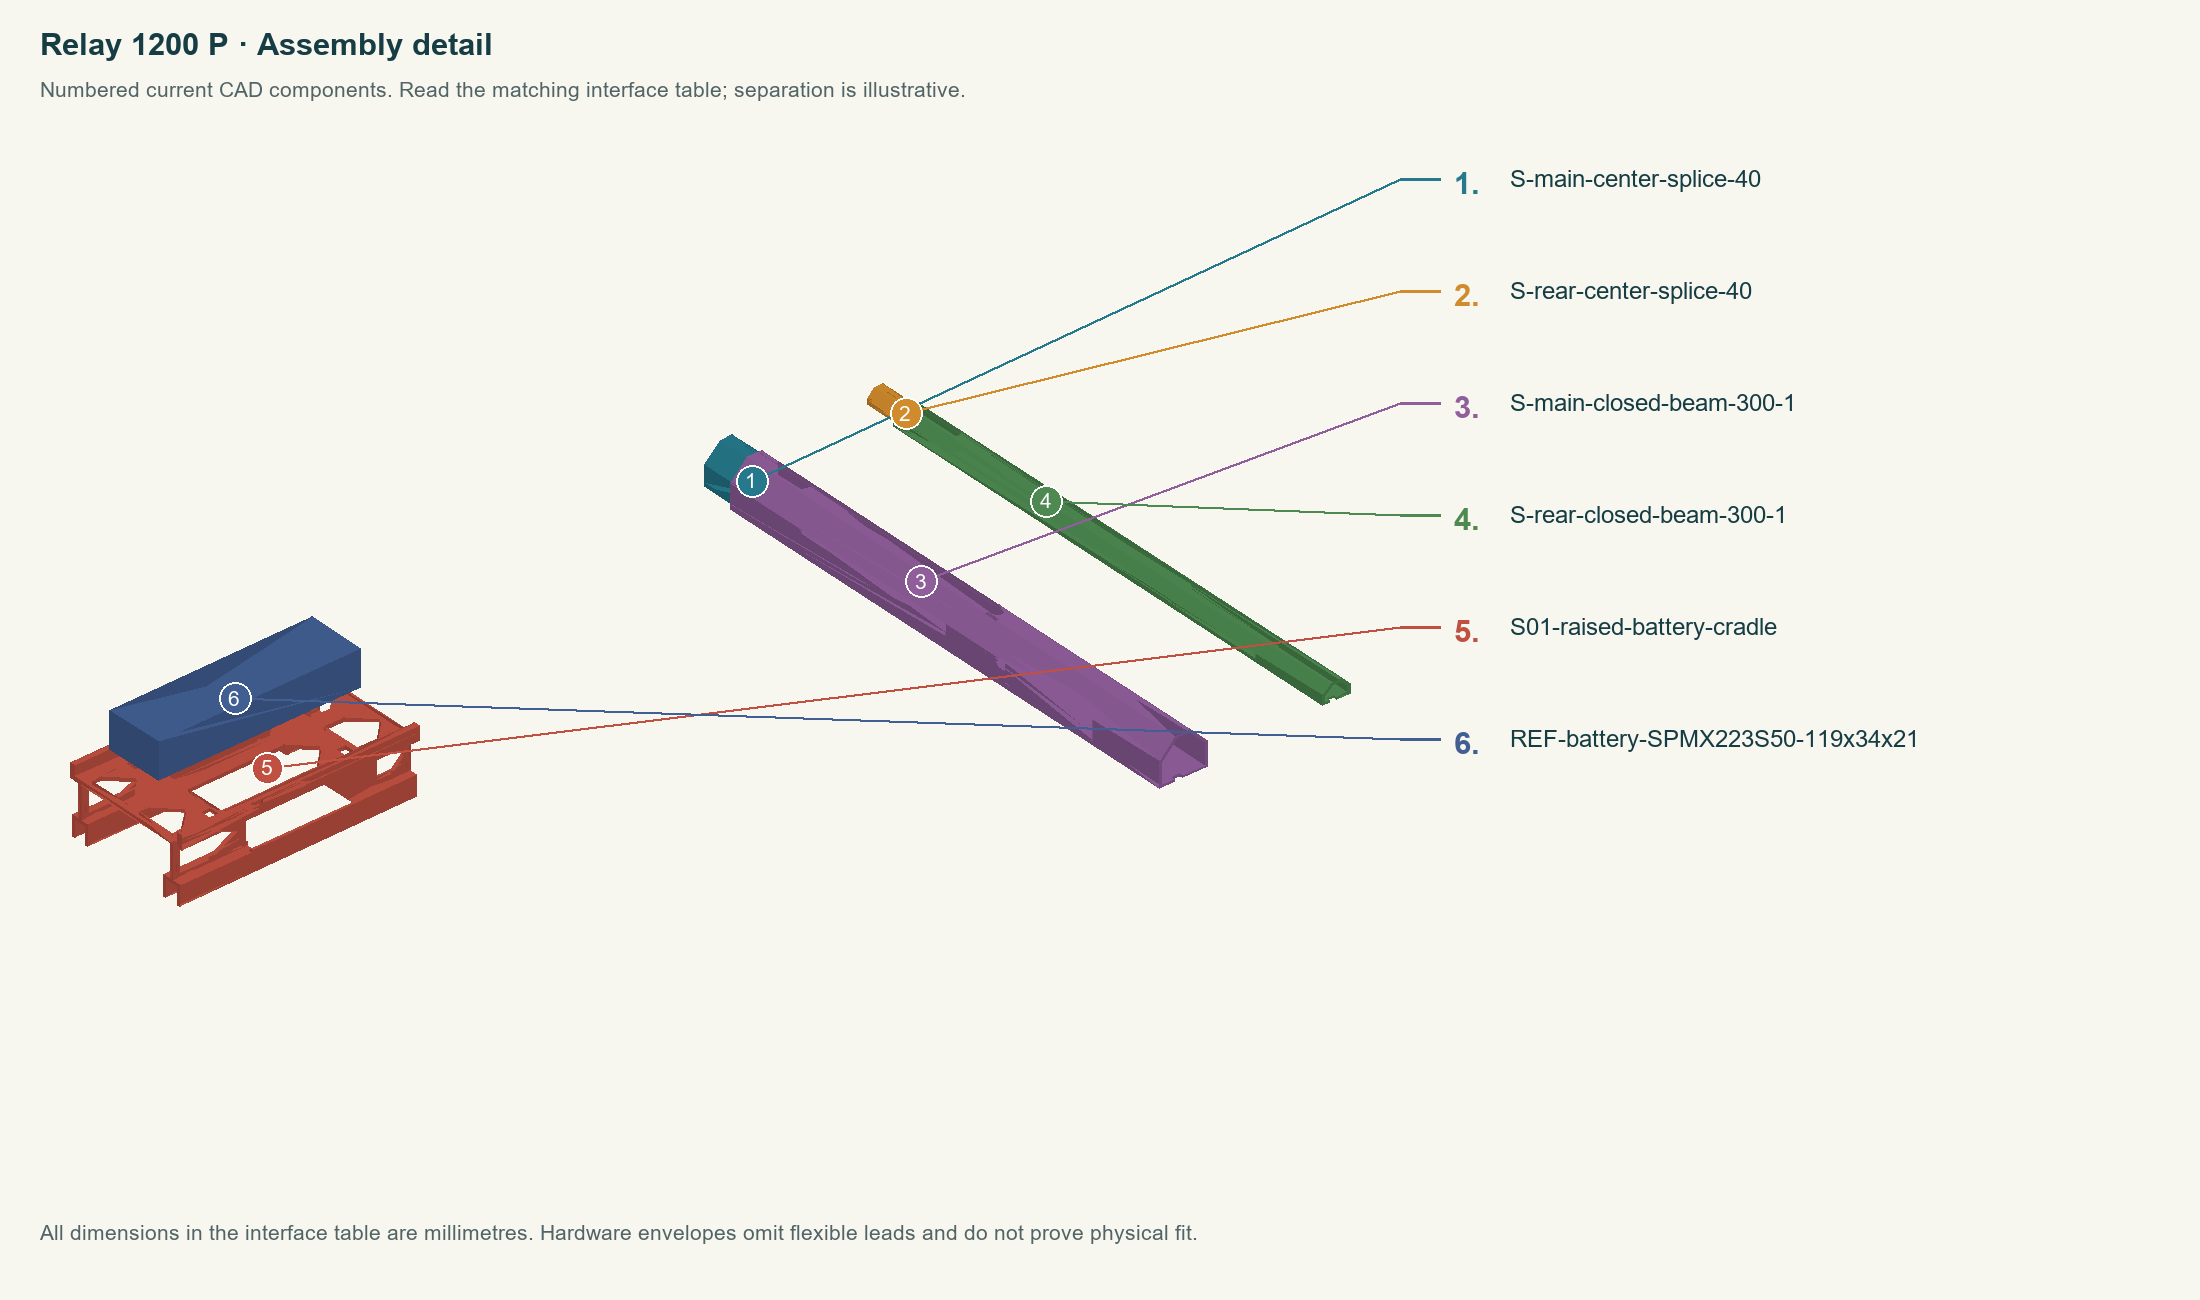
S-main-center-splice-40S-rear-center-splice-40S-main-closed-beam-300-1S-rear-closed-beam-300-1S01-raised-battery-cradleREF-battery-SPMX223S50-119x34x21
Build in this order
- Step 1
Start with the included Relay-fit-first coupons and the actual retract, motor, wheel, servo and rod-end hardware. Record missing pivot/axle dimensions on Hardware-fit-record.html before large-bay assembly.
- Step 2
Print the 17 retained airframe plates once each, plus the single plate containing S04/S05 electronics decks. Do not reprint accepted test parts that are identical to production pieces. Preserve assigned materials/orientations and fit captive nuts before closing slots.
- Step 3
Dry-fit matched v0.10 S-pod-rail--32-1 and S-pod-rail-32-1 into F-L/F-R-rear-chassis, 40 mm engagement ending X300. Fit S02/S03 firewalls and S-gear crossbeam to establish alignment; bonding awaits a qualified adhesive and joint process.
- Step 4
Fit nose retract adapter, steering cassette and battery cradle. Add S04/S05 decks with notches aligned to rear chassis uprights; dry-fit, bond contacting rail lands and use insulating pads/straps as shown. Check actual connectors, steering movement and canopy clearance.
- Step 5
Join P01/P02 body panels at the integral starboard key and 12 mm collar engagement. Install four 6 x 2 mm magnets with correct polarity and retain removable P04 canopy. No separate collar or magnet bar is installed.
- Step 6
Assemble the four wing panels with separate main/rear dense-PLA spars: two 300 mm inner and two 265 mm outer sections per spar line, 40 mm center sleeves (20 mm per side) and 80 mm outer sleeves (40 mm per side). Fit four M2.5 x 35 main and two M2 x 20 rear wing bolts through the compression pillars.
- Step 7
Fit the separate main retract adapters and verify actual gear movement before bonding fairing body bridges and cosmetic fairings. They carry no landing load; nominal viewer sweep is not hardware clearance proof.
- Step 8
Join each boom with its keyed sleeve, 30 mm engagement per side. Square both booms and the tailplane before bonding; fit the separate tail beam and skins. Left boom contains elevator and left rudder servos; right contains right rudder servo. Keep covers removable.
- Step 9
Fit separate keyed aileron horns, six servo bridges, covers and thirteen M2 x 35 hinge pivots (two washers and one locknut each); maintain running clearance. Aileron pivot heads face outward. Exact pushrod/clevis lengths and geometry still need final selection.
- Step 10
Record mass, CG, joint strength, control travel, landing gear clearance, motor/propeller current and temperature, and receiver power behavior. These checks and final radio settings are incomplete; the package is for printing and fitting, not flight readiness.
- Two regular Skywalker 50A V2 ESCs (80060442), one UBEC10A HV (30608000), AR8020T and SPMX223S50 3S2200 are now the fitting baseline. The 50A-6S/Plus ESC is not the same case.
- Receiver-to-UBEC case separation is nominal 154 mm, exceeding the regulator manual’s50 mm minimum. This does not establish immunity from interference; route antennas separately and perform a range test.
- The receiver’s extra SRXL2/Bind/Program/Batt header accepts supply power so all eight PWM outputs remain available. A10 A regulator rating does not rate a single servo plug or receiver bus.
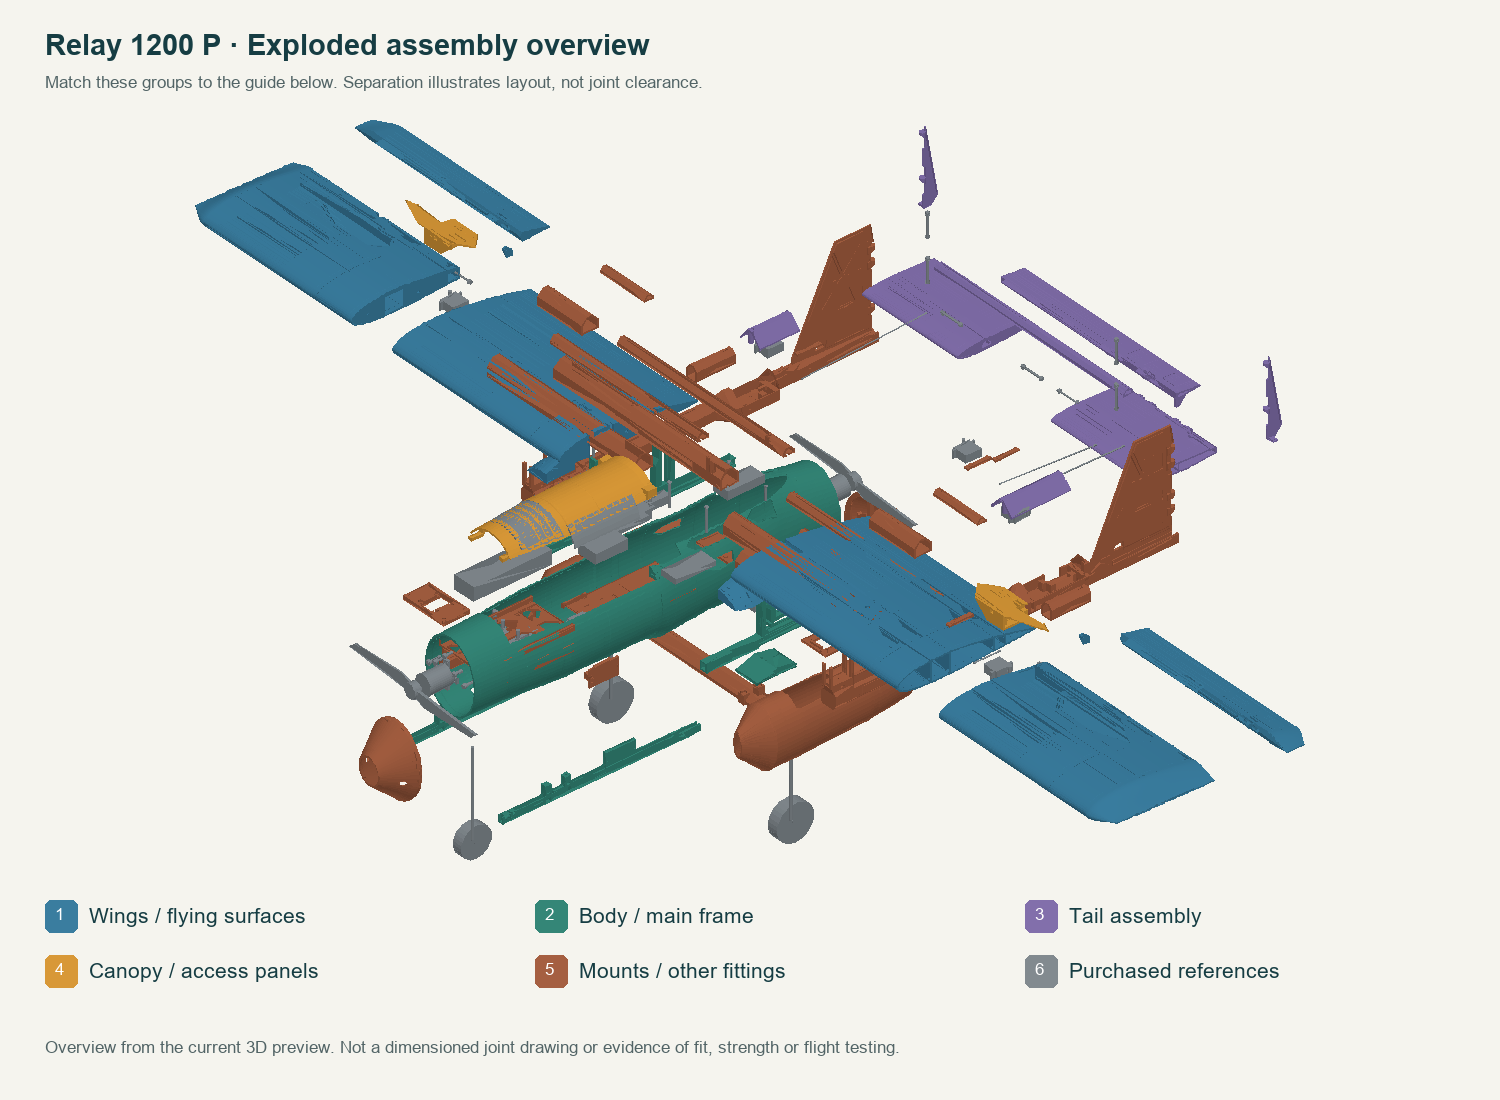
Power and radio setup
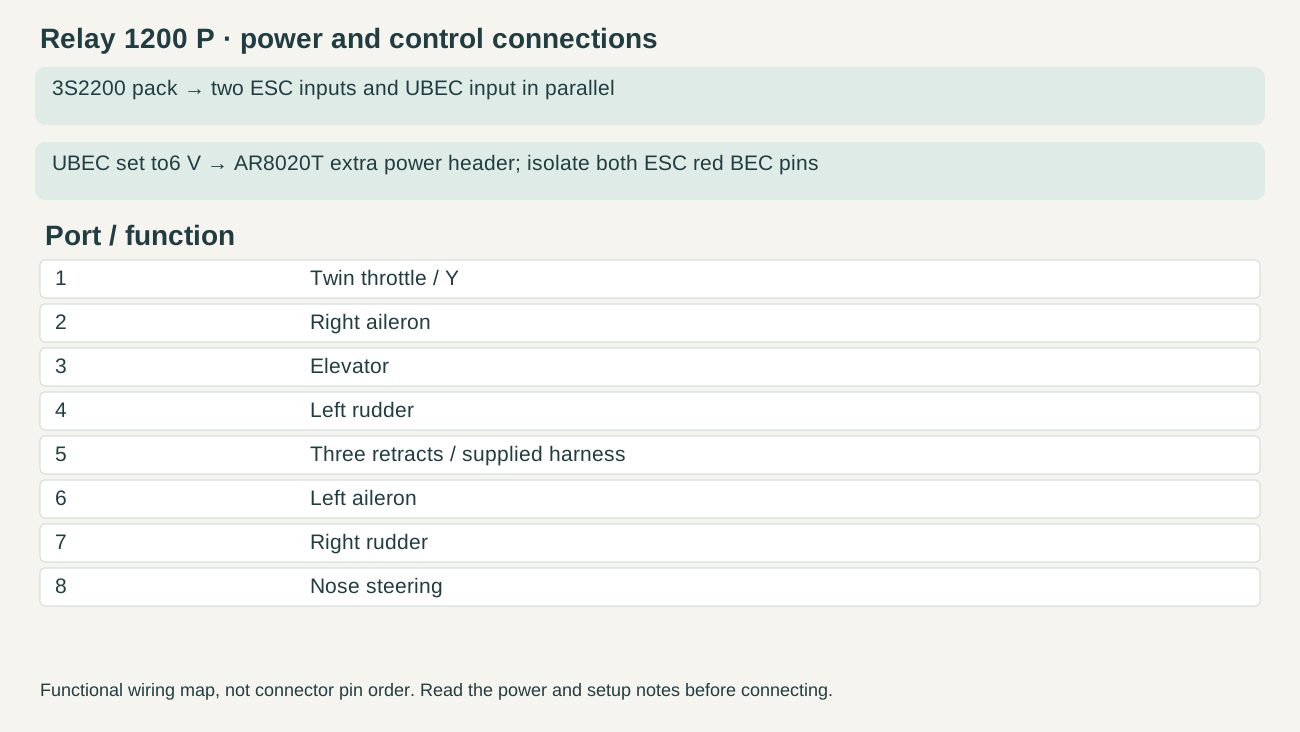
- Keep signal grounds. Use 22 ms analog-compatible operation.
- Center/inhibit steering with gear retracted; verify all gear states without binding.
Keep propellers removed (and Rotor motors disconnected) during setup. Check polarity and regulated bus voltage before plugging in the receiver/servos. Center servos before fitting horns; check neutral, direction and free travel before connecting rods. Configure throttle cut and receiver-loss response, then test them on the installed system.
Fit and bond method
- Dry-fit and mark orientation, contact lands and insertion depth before mixing adhesive. Record actual tube, printed socket and coupon dimensions.
- Use an adhesive whose maker supports both actual materials. Prepare only the intended bond lands as directed; remove dust and let surfaces dry. Do not solvent-wipe a filament without checking compatibility.
- Make matching sacrificial coupons with the same filament, orientation, carbon/wood if applicable, preparation and adhesive. Cure for the maker’s complete schedule and test the joint before committing to inaccessible or structural bonds.
- Bond on an alignment jig. Keep hinges, captive nuts, moving shafts, servo cases, leads and access covers free. Retain evidence of cure, bondline fit and test behavior; no adhesive process or load rating is established by these files alone.
Fasteners and linkage lengths
A listed starting screw length is not permission to bottom a screw in a motor or crush a servo ear. Measure the mount, washer and nut stack; verify locking-thread engagement and moving-part clearance. For a blind threaded motor hole, compare protrusion below the mounting face with the manufacturer’s maximum permitted penetration.
Set servos to neutral and surfaces straight. Install the chosen retained ends with their required thread engagement, measure the ball/pin-center distance, then mark the rod between those actual ends. Viewer centerline lengths are not bare rod cut lengths. Check both travel limits and combined gear/door states before final locking.
What still prevents a completed flying release
- Measured retract pivots, axles and steering sweep; actual rod-end and horn fitting; bond/load tests; loaded receiver bus, propulsion, mass/CG and flight tests.
Use the measurement record to report actual fits and test results. A geometric pass is not a structural rating, slicer validation or flight test.
Detailed source guide
Included in ZIP: Retained model-specific source instructions. Current R2 interface and replacement instructions above take precedence where a retained source describes an earlier revision.